Thursday 29 October 2009

Edible Education

This week, we have mostly been cooking (and eating :-))

Both boys helped make our family's famous lentil soup recipe.  Granny was quite impressed when she came round and saw the production line going - Waif peeling carrots, me chopping them into strips then Gman dicing them!  This soup is dead easy to make, very healthy, gluten and dairy free, vegetarian and really, really delicious.  Here's the recipe:

Lentil Soup

Easy Lentil Soup (serves 4-6)


150g lentils

1 onion, finely chopped

2 carrots, peeled and diced

2 tins chopped tomatoes

1.2 litres vegetable stock

1 tbsp cumin powder

1 tsp garam masala

Chuck it all in a massive pan, bring it to the boil, then cook until the lentils are cooked and the carrots are as soft as you like them (about 30-40 minutes depending on how finely you dice the carrots).


Waif was also keen to help with the roasted vegetables for dinner and spent some time carefully arranging them in the roasting tin until they were "just right".  He then insisted on taking a photograph so here they are:

Veg for roasting

Granny also brought us round some fantastic looking cooking apples from the market.  There were only 2, but they were pretty massive so probably about a pound in weight, maybe even more.  Fancying a change from the usual apple crumble, we made this pudding and it went down a treat:

Apple Almond Pudding

Gluten Free Casein Free Almond Apple Pudding

1lb cooking apples, stewed in a little caster sugar

2oz golden caster sugar

2oz dairy free margarine

2oz ground almonds

1 egg, beaten

  1. Cream the butter and sugar together, then beat in the ground almonds.

  2. Beat the egg into the almond mixture.

  3. Place the stewed apples into an ovenproof dish.

  4. Spoon the almond mixture over the top of the apples.

  5. Bake at Gas Mark 4/350F/180C for about 25-35 mins until the top is lightly set and golden.

Monday 26 October 2009

Book Sharing Monday - Walking Through the Jungle


This is a lovely book.  Waif would borrow it from the library until he had renewed it the maximum number of times, take it back, then a couple of weeks later he would choose it again!  So we were thrilled to go to the monthly book sale one day and find that it was for sale for the princely sum of 20p.  Woohoo!!


The story is written in a repetitive, rhythmic style with a different animal "chasing after me" each page.  This makes it easy for your child to join in, even if they aren't reading yet.  And it's fun to try and remember which animal comes on the next page.


The illustrations are beautiful and colourful.  Oh - and there's a happy ending, because all the animals come together at the end to sit down for a meal.


I thoroughly recommend this book for your 2-5 year olds.

book sharing monday

Saturday 24 October 2009

Home Ed Anniversary

It's a year today since Gman left school - a whole year of home educating - and what a year it's been!

We've learned all sorts between us, made some fabulous new friends and generally had a ball.  Sure, there have been moments of doubt and frustration but overall, it's been the best decision we ever made.  I only wish we had done it earlier.

Home Ed Rocks!

Wednesday 21 October 2009

Cotton Bud Skeleton

A rainy day today and the boys settled down to watch Mister Maker this morning.  They were both keen to make the cotton bud skeleton featured on today's show, and here it is, in progress and complete:

[caption id="" align="alignnone" width="240" caption="Waif does some rib sticking"]Waif does some rib sticking[/caption]

[caption id="" align="alignnone" width="240" caption="Gman putting together the pelvis"]Gman putting together the pelvis[/caption]

[caption id="" align="alignnone" width="180" caption="The boys are pleased with their skeleton"]The boys are pleased with their skeleton[/caption]

If  you are trying this at home, watch out for cotton buds pinging round the room when you are cutting them!  Waif was particularly pleased when one cotton bud tip ended up caught in a spider's web (ooh, does that give away my lack of housewifely skills?!) and wondered if the spider would be pleased and try to eat it!

For full instructions, you can watch the Mister Maker episode on iPlayer here.

Star Wars Come Dancing

Gman has been working on an interesting new Lego concept, integrating two of his latest interests - Star Wars and Strictly Come Dancing!  He has built a dance studio complete with set of four judges (who include a Storm Trooper and Ewok amongst their numbers) and couples dancing include Princess Leia with Han Solo (of course).  He is planning a series of animations around this.  Here's a still from the first one he has photographed:

[caption id="" align="aligncenter" width="500" caption="First couple await comments from the judges"]First couple await comments from the judges[/caption]

Blogger v Wordpress

Well, I gave Blogger a try...but I prefer Wordpress so here I am with my blog posts safely imported from Blogger.  I like the fact that I can put my pictures where I want them, I can see who is visiting the blog from where and I just generally find it much easier to use.  Only thing is, I don't know how to get buttons down the sidebar - can anyone help with that?

Blogger versus Wordpress

Well, I've tried out this blog on Blogger, but have to say I prefer Wordpress. It's not as pretty but it's easier to use (I can easily place pictures where I want them!) and I like the stats...so I've moved the blog here:

http://homedible.wordpress.com/

Please visit :-)

Friday 16 October 2009

More Autumn Leaves


Waif's enthusiasm for furnishing the autumn table knows no bounds! He has coloured in a beautiful little "My Autumn Book" printed from the Crayola website (coloured so neatly, I accused his Dad of having coloured it!) and we had a go at making paper bag autumn leaves from this tutorial. Both boys enjoyed splodging the paint onto the flattened paper bag, but also particularly enjoyed swirling the paint colours together, which is how ours have ended up with considerably more red in the mix than Creative Kismet's! As predicted, the boys did lose some enthusiasm when it came to painstakingly cutting autumn leaf shapes out of the ensuing pretty coloured bag so that was left to Mummy ;-). Rather than make a garland, Waif has stuck our leaves all around the fireplace and they look rather nice, although he has presented them rather more uniformly than I might have liked (all of one shape on the left side, another shape at the top, other shape on the right!) Where did he get such an orderly mind?!

Monday 12 October 2009

Seasonal Table


This last week has involved lots of craft projects for the seasonal table. Waif has been particularly enthusiastic about this. "What can we make for the autumn table now, mummy?" being the refrain of the week!

Here's a snapshot of the table in progress. We have woollen apples (instructions here), an autumn-themed magic wand, a kitchen roll tube autumn tree, painted stencil autumn leaves, a tissue-paper paper plate apple and various items collected on nature walks.

As well as these, this morning we have made an autumn leaf sun catcher to hang in the window. Waif laid the leaves on a sheet of sticky back plastic, added red and gold glitter, then we pressed another sheet of the plastic on top. This is hanging in the window by an orange ribbon and looks lovely when the sun shines through.

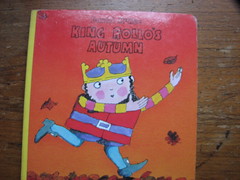
Book Sharing Monday - King Rollo's Autumn


Thought this was a wonderfully seasonal book to share (and another David McKee classic!)

You can read the text of the book here.

Our favourite line of the book is the observation from King Rollo that "Trees are funny. They take off their clothes, just when people are putting on more".

We also have the spring, summer and winter books and will probably be sharing these in future posts!


Friday 9 October 2009

Gluten Free Chocolate Cake


Well, a birthday wouldn't be complete without a chocolate cake would it?!

Gluten Free Chocolate Sandwich Cake

60z margarine
6oz caster sugar
couple of drops of vanilla essence
2 eggs
1 teaspoon baking powder
6oz gluten free plain flour
1 tablespoon cocoa powder
3 tablespoons rice milk
chocolate spread to stick it all together


1. Preheat oven to 170C. Grease and line two 8" sandwich tins.
2. Cream together the margarine, sugar and vanilla.
3. Beat in the eggs one at a time, then add the rest of the ingredients.
4. Divide between tins, bake for approximately 15 to 20 minutes.

We make this cake quite a bit, as it's easy to remember the ingredients (6oz of everything - 666!), it takes minutes to whip up, and it tastes pretty good. Normally, we just sandwich it together with chocolate spread in the middle, then dust the top with icing sugar but for a special occasion and extra gooey-ness, we put the chocolate spread on the top and the middle. Yumyum. I particularly recommend Plamil's chocolate orange spread for this!

I think you could make this with ordinary wheat flour, but you wouldn't need the rice milk.


Thursday 8 October 2009

Birthday artwork

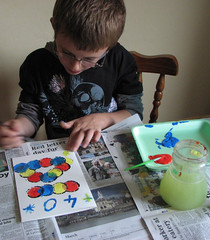
This week saw the arrival of Daddy's 40th birthday, so this formed the centre of our artwork. The boys were very taken with this modern art project over at the frugal family fun blog and wanted to do something similar for their birthday cards. Gman used a bottle top to print his circles, though he wanted his in a slightly more uniform pattern as can be seen below. (Gman's is the one on the right)


Waif used our trusty star shaped cookie cutter, which has been invaluable in more than one art project in the past. They printed onto white card and then left this to dry before colouring the shapes with different coloured paints, creating areas where the colours mixed (very educational!)


These were then used for birthday cards, and they looked lovely and colourful. Waif went on to add some glitter to his, which kind of spoiled it a bit for me but he is a bit of a glitter fiend :-)

Inspired by their creativity, I decided to have a go at making a birthday card too. Before starting out on home-educating, I would never have considered myself an arty crafty type, so this is all quite new and exciting still. Here's the card I made, with a seasonally inspired felt pumpkin on the front:

Monday 5 October 2009

Book Sharing Monday - Two Monsters


It's not been easy deciding which book to share for my first Book Sharing Monday post, but I have settled on "Two Monsters" by David McKee because it has been a favourite of first Gman's and then Waif's, and it's a fun book for adults to read aloud too.

The story tells the tale of two monsters who live on opposite sides of a mountain. One evening, at sunset, they argue about whether it is day departing or night arriving, and start to trade insults and throw rocks. Over the course of the next day, they throw so many rocks that there is nothing left of the mountain , at which point they can see that they were both right - day departs as night arrives - and settle down to watch the sunset together.


One of the highlights of the book for my boys has been the extraordinarily colourful and humorous insults - our favourite is "You're a pathetic, addlebrained, smelly, lily-livered custard tart!"- you've got to love David McKee and I'm sure we'll be sharing more of his books on Mondays to come.

Sunday 4 October 2009

Gluten Free Peanut Butter Cupcakes

Last Thursday saw the arrival of my Suma order, which included six jars of peanut butter so couldn't resist making these cupcakes! Today was joined only by Waif in this, as Gman was far too busy making the arrangements for his latest Lego animation, which is going to involve storm troopers searching the galaxy for suitable Christmas presents for Darth Vader :-)

Anyway, here's the cakes and rather yummy they are too:


Gluten Free/Casein Free Peanut Butter Cupcakes

50g dairy free margarine (we like Vitalite in our house)
200g light brown soft sugar
1 large egg
1tsp vanilla extract
90ml rice milk
125g crunchy peanut butter
150g gluten free plain flour (we used Doves Farm brand for this)
1tsp baking powder
1/2 tsp salt

1. Preheat oven to 150C/Gas Mark 2. Line bun trays with 18 paper cases.
2. Melt the margarine, let it cool down a bit. With electric whisk, mix together the marg and sugar (you could do this by hand with a wooden spoon, but it's not as exciting ;-)) Add egg and keep beating. Stir in the vanilla extract, rice milk & peanut butter.

3. In another bowl, sift together flour, baking powder & salt, then fold into peanut butter mixture until well combined. Divide between the cases and bake for 25 minutes.


For those not following a gfcf diet, these could be made using butter, wheat flour and dairy milk, but use a bit less milk - gluten free flour soaks up more liquid.

We liked them as they came but you could probably ice them if you were that way inclined - I am far too impatient for icing, cos I like to eat my cakes warm from the oven!


Thursday 1 October 2009

Autumn Trees

The boys have been making these lovely tree paintings:


First of all I painted Waif's arm with brown paint and he pressed this onto the page to make the tree trunk and branches. At this point Gman declared "yuk! yuk! yuk!" and refused to have his done (he has some sensory issues related to ASD so wasn't too surprised at this!) Luckily Waif was more than prepared to do more tree trunks - making two trees for his painting. When these had dried, they used fingers to print the different coloured leaves on (Gman was ok with this bit!). Gman painted his grass with a brush and Waif used a piece of cardboard. When they had dried we mounted them on the different coloured card.

Don't they look fabulous?

The idea originally came from the Kaboose website here. There are loads of great ideas there, it's well worth a look.